High gloss furniture wrap is a thin, self-adhesive architectural film that gives cabinets, doors, tables and built-ins a mirror-bright finish without replacing anything. It works best on smooth, sound surfaces, away from direct heat, and it succeeds or fails on two things: surface prep and how the film handles edges. Bodaq Interior Film is stretchable and uses an air-channeled adhesive, which makes both of those easier to get right, so you can refresh a space in a day or two instead of weeks.
This guide covers what gloss really means, where a glossy wrap belongs, how to prep and apply it, and how to keep it looking sharp. It is written for designers, property managers, hospitality teams and homeowners who want a premium result without a tear-out.
TL;DR
- High gloss wrap suits smooth, rigid, clean surfaces such as cabinet doors, drawer fronts, wardrobes, desks and reception joinery. Keep it away from cooktop heat.
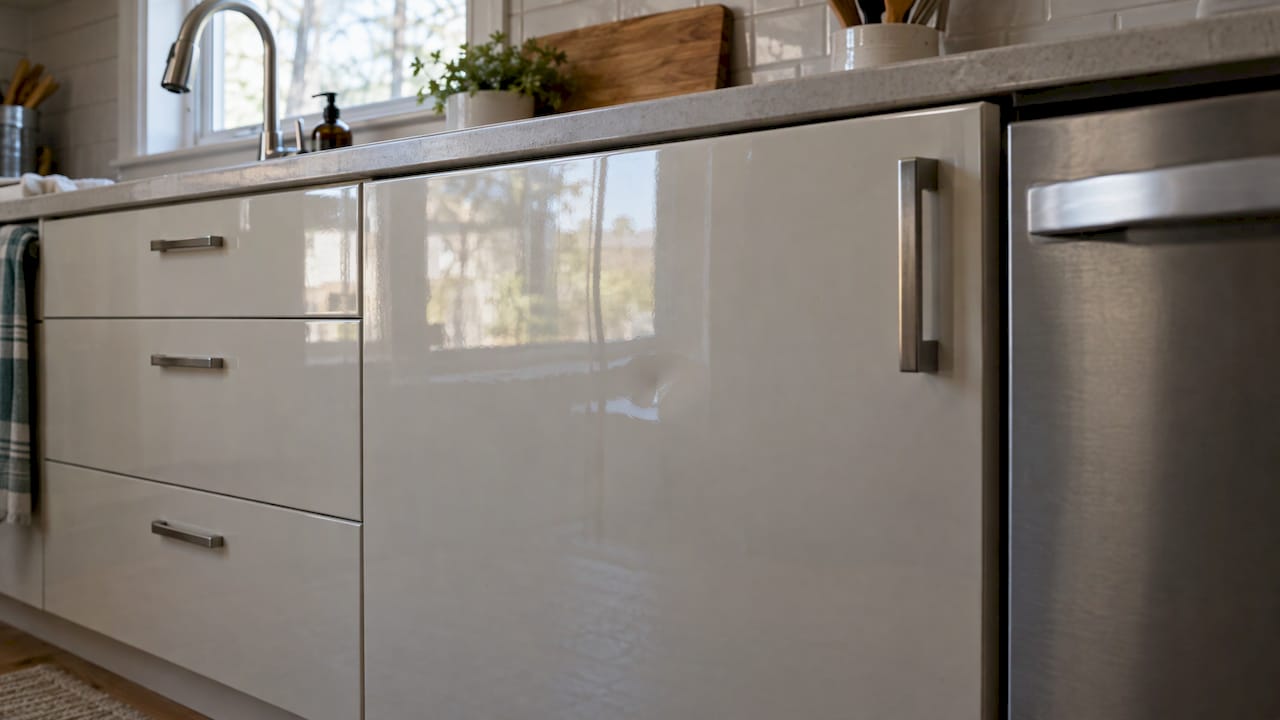
- Gloss is measured at a 60-degree angle. Readings of roughly 80 to 95 gloss units read as high gloss, so pick the level on purpose, because shine shows fingerprints.
- Prep decides durability. Degrease, clean, dry and check the substrate before any film touches it, then finish edges with care.
- Bodaq film is stretchable and self-adhesive, with air channels that help release trapped air, which supports clean installs on doors, panels and furniture.
- A kitchen wrap can be a one-to-two-day job, which suits occupied homes, hotels and offices.
Table of Contents
- What “high gloss” actually means
- Where high gloss wrap works best
- What the evidence says about durability
- Why film choice changes the installation
- How to prep, cut and apply high gloss wrap
- Keeping the shine: care and cleaning
- Cost, time and disruption
- Choosing a film for your project
- Promo: Wrap the surfaces you already have
- Our perspective
- FAQ
- Sources
What “high gloss” actually means
Gloss is not a vague style word. It is a measurement of how much light a surface bounces back at a set angle. Panel makers measure it at 60 degrees, and a reading above 90 on a 1 to 100 scale is treated as the best gloss for a decorative surface. In practice, designers sort finishes into rough bands: high gloss at the top, satin or semi-gloss in the middle, and matte at the bottom.
That matters because a wrap is chosen by eye but lived with by hand. A deep, reflective surface makes a small room feel larger and carries color with real depth. It also shows every fingerprint, and a dark glossy color shows them most. The finish you pick is a design decision with a cleaning routine attached.
Here is how the three bands behave in real rooms:
| Finish | Look | Best use | Upkeep |
|---|---|---|---|
| High gloss | Reflective, sleek, almost lacquered | Statement doors, accent joinery, reception desks, wardrobes | Wipe often; shows prints and dust |
| Satin or semi-gloss | Soft sheen, forgiving | Busy kitchens, commercial casework | Moderate |
| Matte | Flat, calm, low glare | Family kitchens, bedrooms | Hides marks, can read flat in dim light |
A useful rule: let gloss be the accent and not the whole room. A run of glossy upper doors against a textured wood-look base, or a single glossy wardrobe wall in a hallway, gives the sculptural effect of a lacquered piece without a wall-to-wall mirror effect.
Where high gloss wrap works best
The film needs a smooth, stable face to sit on, because a glossy surface magnifies whatever lies beneath it. Dents, raised grain, old peeling laminate and uneven paint all telegraph through. That is why the best candidates are:
- Cabinet doors and drawer fronts in thermofoil, laminate, melamine, painted MDF or sealed wood.
- Wardrobes and closet doors, where large flat panels show gloss at its best.
- Desks, credenzas and reception counters in offices and hotel lobbies.
- Interior doors, where a single color can reset a corridor.
- Retail and hospitality fixtures that need a new look between seasons.
Heat is the one real constraint. High-gloss surfaces are not recommended for horizontal surfaces that need high-temperature resistance, such as cabinetry above a cooktop. So in a kitchen, put the gloss on wall units, pantry doors and island fronts, and choose a textured or matte Bodaq film for the zone beside the range. It is a smart way to build a layered scheme, and it keeps the glossy pieces looking their best.
Check the substrate first
Before ordering film, run your hand over each surface and look at it in raking light, with a lamp held low and to the side. You are looking for:
- Smoothness. Gloss exaggerates texture. Fill and sand chips, gouges and raised edges.
- Soundness. Laminate or thermofoil that is bubbling or peeling must be re-bonded or removed.
- Cleanliness. Kitchen doors collect cooking grease that is invisible until the film fails.
- Moisture. Swollen or damp-damaged board will keep moving under the film.
- Shape. Flat panels are simplest. Routed profiles and curves need a stretchable film and a patient hand.
Bodaq’s guide on wrapping curved surfaces with interior film is useful when a door has a routed profile or a furniture piece has a soft radius.
What the evidence says about durability
Independent testing is encouraging. In its May 2026 test of seven vinyl wraps for kitchens, Consumer Reports found that none was totally foolproof, yet several suit beginners with a little practice. None lifted when heat from a hair dryer or water along the edges was applied, and none damaged the surfaces they were applied to.
Two takeaways follow. First, installation skill matters as much as the film, which is why a film built to forgive small errors is valuable. Second, edges are where wraps fail, so the edge plan is part of the job, not an afterthought.
It is also worth knowing how wrap sits beside other glossy surfaces. Contemporary gloss panels come as PET film, acrylic or UV lacquer, each with its own balance of price, shine and wear resistance. Factory gloss panels mean replacing doors or boxes. A wrap changes the surface you already own, which is why it appeals to anyone who needs a new look without a long project.
Why film choice changes the installation
The film does a lot of the work for you when it is designed well. Bodaq Interior Film is a premium architectural film by Hyundai L&C, and we built our approach around three practical points:
- Stretchability. The film conforms around profiles, corners and soft curves without tearing or leaving a wrinkled edge.
- Self-adhesive backing with air channels. The adhesive is designed to let air escape as you squeegee, so bubbles are easier to push out.
- Low waste. Because the film conforms and repositions to the shape of the piece, off-cuts are kept to a minimum.
On a glossy finish those details matter more than on any other, because a bubble or a stretch mark is far easier to see in a reflective surface. If you want to see how our approach plays out on a full project, our page on wrapping kitchen cabinets in 1 to 2 days walks through it.
How to prep, cut and apply high gloss wrap
This is the routine we recommend. At each step we note where it usually goes wrong and what the film helps with.
Step 1: Remove hardware and plan the layout
Take off handles, hinges and any trims. Number every door and drawer so it returns to the same place. Decide where the seams, if any, will land, and keep them on the least visible side. Orient the film so that the sheen reads consistently across neighboring doors.
Where it goes wrong: wrapping with hardware still on leaves cut lines around screws that collect dirt and lift later.
Step 2: Degrease and clean
Use a degreasing cleaner and then a final wipe with a lint-free cloth. Clean the edges and the back lip as well as the face. Let everything dry completely.
Where it goes wrong: poor cleaning is the single most common cause of failed wraps, according to wrapping professionals, and the first sign is a corner that lifts within weeks. Our five-step guide to surface prep for film covers the detail, including how to treat difficult substrates.
Step 3: Repair and smooth
Fill chips, sand rough patches flush and dust off. On very slick substrates, lightly scuff so the adhesive has something to key into, then clean again.
Where it goes wrong: a small dent that looks minor in matte becomes a visible shadow under gloss. Fix it before you wrap.
Step 4: Cut oversize
Rough-cut each piece with a generous allowance on every side, enough to wrap onto the edge and to hold while you work. Handle the film by its edges, and keep your work area dust-free, because particles trapped under a glossy film show as bumps.
Step 5: Apply from the center outward
Peel back a small section of liner, position the film, and anchor it in the middle. Work out toward the edges with a felt-edged squeegee, using firm, overlapping strokes. The air channels in the adhesive let trapped air travel out, so a bubble can usually be pushed toward the edge rather than lifted and redone.
Where it goes wrong: pulling the film tight across the face. Stretch should be used to wrap an edge or corner, not to flatten a large panel, because over-stretching can distort the finish. Let the film lie naturally, then squeegee it down.
Step 6: Wrap the edges and corners
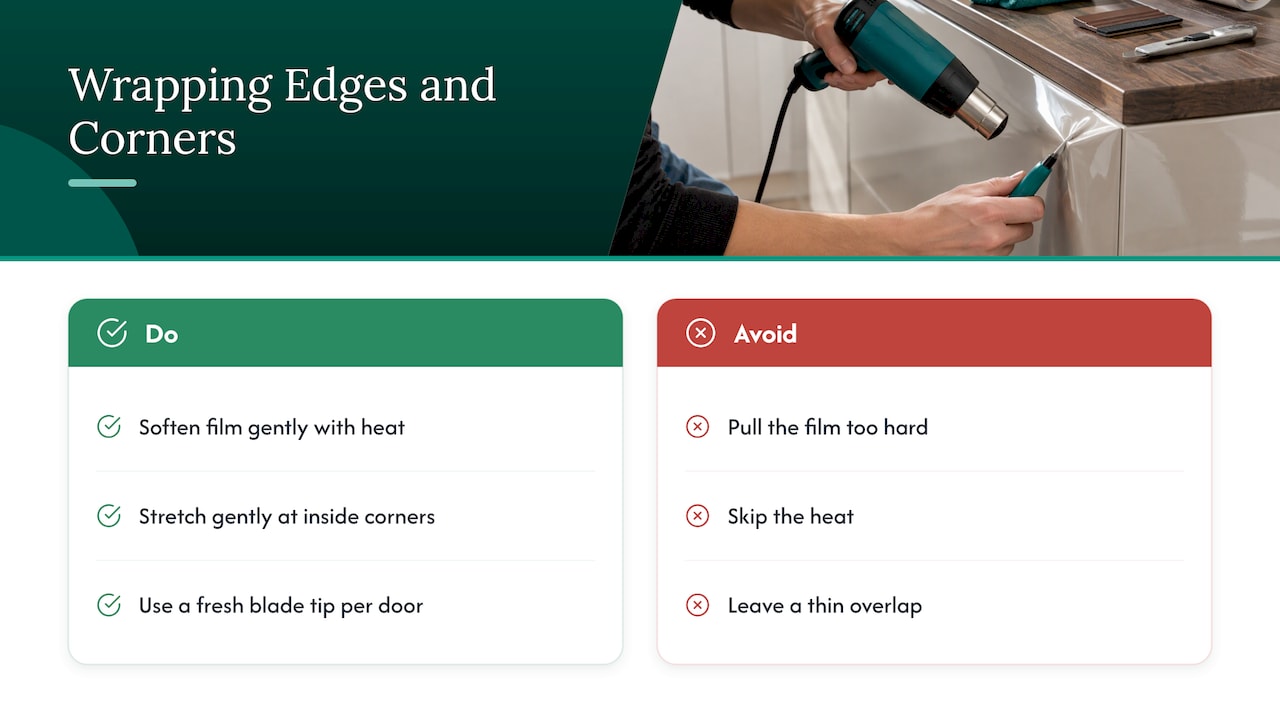
Heat the film gently to soften it, stretch it around the edge, and press it down firmly. At inside corners, relieve tension with a small controlled stretch rather than a cut. On outside corners, the stretch lets the film follow the shape without pleating. Trim with a sharp blade, using a fresh tip for each door.
Where it goes wrong: edges are the most common failure point on any wrap. Pulling too hard, skipping the heat or leaving a thin overlap all invite lifting. Heat and firm pressure on the wrapped edge, then a final pass once the film has relaxed, set it properly.
Step 7: Post-heat, inspect and reinstall
Go over the edges and any stretched areas with gentle heat so the film locks to its new shape. Inspect in raking light, fix any leftover air pockets, and let the film settle before reattaching hardware. For doors, the technique is the same, and our page on door wrap installation explains how professionals bring the work down to 30 to 90 minutes a door.
Keeping the shine: care and cleaning
Glossy surfaces are easy to care for, but they reward a routine.
- Wipe with a soft microfiber cloth and mild soapy water. Dry afterward to avoid streaks.
- Avoid abrasive pads and powders, which dull a reflective finish.
- Keep dark glossy colors on lower-traffic pieces if you dislike visible prints, or choose a lighter tone.
- Watch the zones near ovens and cooktops, where heat can lift edges over time.
- Treat a lifting edge immediately. Warm it gently, press it back and check that the surface beneath is clean.
Glossy sheets also reveal fine scratches over time and can be hard to repair seamlessly, which is a practical reason to protect high-touch spots. A glossy wrap is meant to be refreshed, and replacing a single door’s film is far simpler than refinishing a lacquered panel.
Cost, time and disruption
The appeal of wrap is speed and scale. A kitchen can be wrapped in one to two days, a hotel corridor can be refreshed in sections with no closure, and an office reception can be updated over a weekend. Compared with replacing doors or panels, you avoid demolition, waiting for factory lead times and the dust that follows.
Costs vary widely with the number of doors, the substrate condition and whether you hire a professional. Our cabinet wrap cost guide lays out how to think about a project budget, and for contractors, our overview of vinyl film for kitchen refinishing explains where film saves time on a job.
Choosing a film for your project
Start with the room’s function and the finish you want, then match the film to the demands of the surface.
- Define the role of gloss. Accent or whole room? Statement doors or the full run?
- Choose a color by light. Light, bright colors keep a glossy room open and are kinder to fingerprints. Deep tones feel dramatic but need more wiping.
- Add texture for balance. Pair a smooth sheen with a wood-look base. Our article on wood-look vinyl films shows how natural grain softens a bright finish.
- Plan for heat and water zones. Keep gloss out of range-hood zones.
- Order samples. Look at them in your own light, morning and evening, before committing.
Our catalog offers more than 450 textures and colors across wood, metal, stone and marble, fabric and leather, and solid colors, so a glossy statement can sit beside a quieter companion finish within one family of products. If you are specifying for a brand, a single catalog keeps a look consistent across rooms and sites.
Promo: Wrap the surfaces you already have
If you are ready to start, explore the Bodaq Solid Colors Collection and the rest of our range of self-adhesive, stretchable interior film for walls, furniture and doors. You can request samples, and we also offer installation tools and certified training for professional installers.
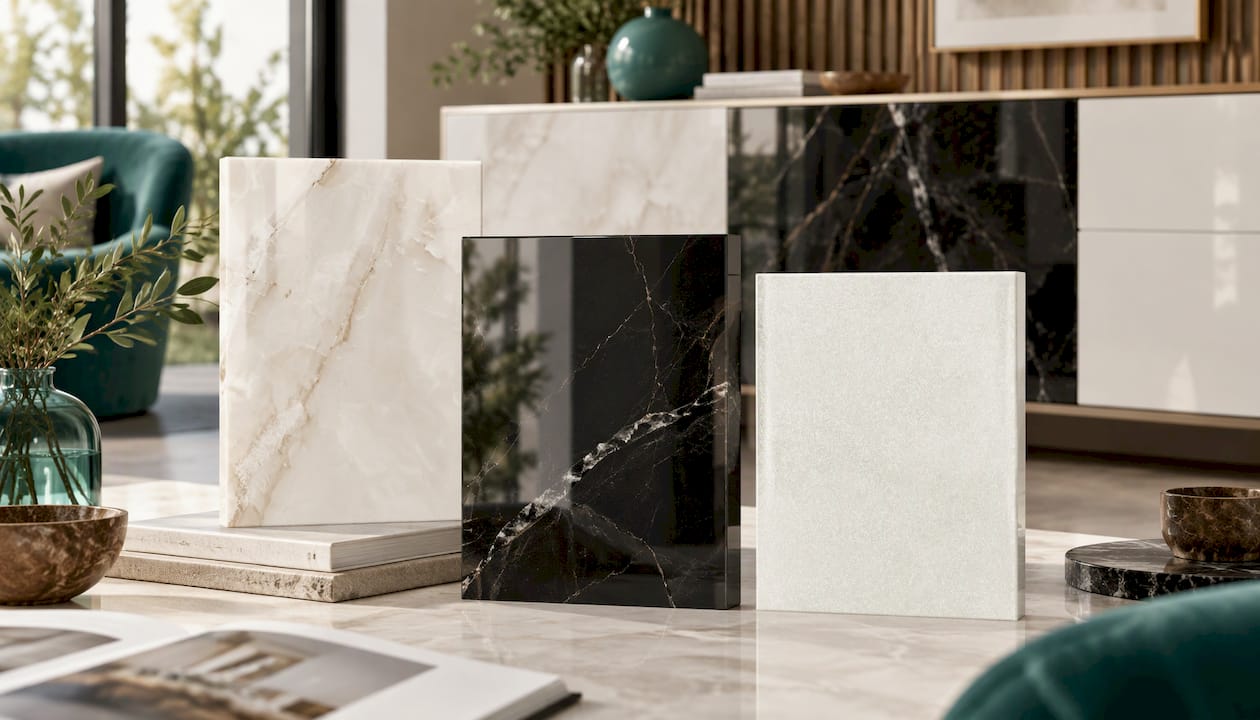
For a clean white to start from, see Pure White, Premium Collection BLC05, or look at Easy Clean, Collection ECF01 for a high-performance solid color.
Our perspective
We think a glossy surface is the design equivalent of a tailored garment: when it fits, everything looks deliberate, and when it does not, every flaw is on show. That is why we put so much into the film itself.
A stretchable film with air-channeled adhesive gives installers room to do careful work. It lets the material follow a door profile, an edge or a soft curve without fighting it, and it keeps waste low. For a hotel manager, that means rooms and corridors back in use sooner. For a homeowner, it means a refreshed kitchen without a long disruption.
We would encourage anyone to treat the gloss level as a design choice and the prep as the real craft. Clean thoroughly, plan the edges, and let the film do what it was made to do.
Bodaq
FAQ
Can a wrap have a glossy finish?
Yes. Self-adhesive architectural films come in gloss, satin and matte finishes, and high gloss is read as roughly 80 to 95 gloss units on a glossmeter. Choose the finish by how the room is used, since shine highlights fingerprints and fine surface flaws.
Can I wrap kitchen cabinets with a high gloss film?
Yes, on doors and drawer fronts that are clean, smooth and sound. Keep glossy film away from cabinetry above a cooktop, where heat is a concern, and use a textured or matte option in that zone. Our guide to wrapping kitchen cabinets shows how a full kitchen can be done in one to two days.
How long does a wrap last?
Longevity depends mainly on preparation, edge finishing and heat exposure. A clean, dry, sound surface and well-pressed edges give the film its best chance, and individual pieces can be re-wrapped when you want a change.
How do I clean a glossy wrap?
Use a soft microfiber cloth with mild soapy water, then dry it. Skip abrasive pads and strong solvents. Wipe high-touch doors more often, especially in dark colors where prints show.
Do I need a professional to apply it?
Careful homeowners can wrap simple flat pieces, but curves, long runs and commercial projects benefit from trained hands. Bodaq offers certified training for professional installers, and our team can point you to the right film for the job through Bodaq Interior Film.
Sources
- Consumer Reports: The Best Vinyl Wraps for Revamping Your Kitchen, Tested
- Woodworking Network: From texture to shine, key surface trends shape modern cabinet design
- Woodworking Network: Understanding contemporary gloss and matte panels
- SSI North America: StyleLite high gloss laminate